
Operations Manual
Description of the system and guide for day-to-day operations and maintenance.
Document History
Date | Description |
November 15, 2014 | First version. |
Introduction

SLIP:td provides an infrastructure for publishing electronic content. The backbone of which is Microsoft SharePoint. Originally, SLIP was an acronym for SharePoint List Item Publisher. Historically it was only a component for uploading files and creating pages in SharePoint libraries. Later, it has been extended with transformation and deployment features among other things – hence the current name SLIP:td.
This document describes the SLIP:td system and points out control and error handling options. It includes details on how to set up error handling, how to set up automatic clean up, and how to handle different types of errors.
Overview
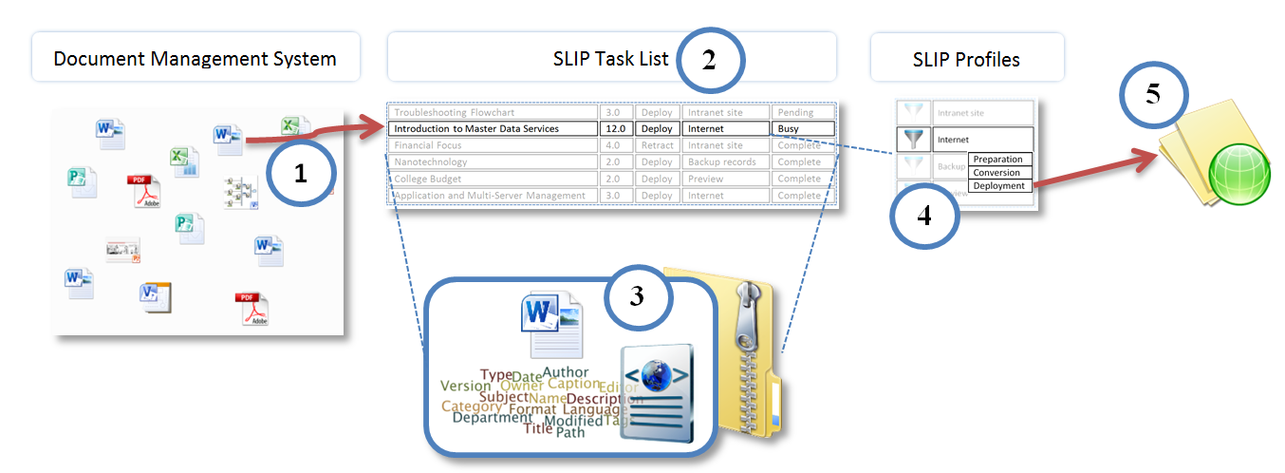
SLIP:td contains a work queue, the Task List, that is continually being polled for pending tasks. Each task consists of some metadata properties and usually a single source file. When SLIP:td processes a task, it uses the metadata of the task to decide which processing profile is appropriate to handle the task. The profile consist of a number of work steps that the system executes in sequence and usually ends with some kind of delivery action.
In most scenarios when documents reach a specific level in their document libraries, the system generates a corresponding task in the task list. Each task has one of two action modes: Either Deploy or Retract. When a document is deleted from the document library, a retract task will normally be generated, while the status of the document determines when a deploy task is generated. This logic ensures that current documents in the document libraries will correspond to pages in the web site.
When the system has processed a task, it writes the event to the log list with an indication of whether the operation succeeded or failed. In normal operation, with unchanged configuration, a failure would be rare and usually caused by some problem with the source document.
Configuration Handles
 SLIP:td can be hosted on several web sites in SharePoint, but in most cases there will be just a single instance. For reference, it may be useful for you to make a note of the addresses of the environments that exist in your organization:
Environment | Web Site Address |
Example | http://intranet.acme.com/sliptd/ |
Development | |
Test | |
Staging | |
Production | |
If you open the URL for a site, as specified above, you will be able to find the SLIP-related lists either in the left-hand navigation column or via the Site Contents link, which will give you an overview of all the lists in the site.
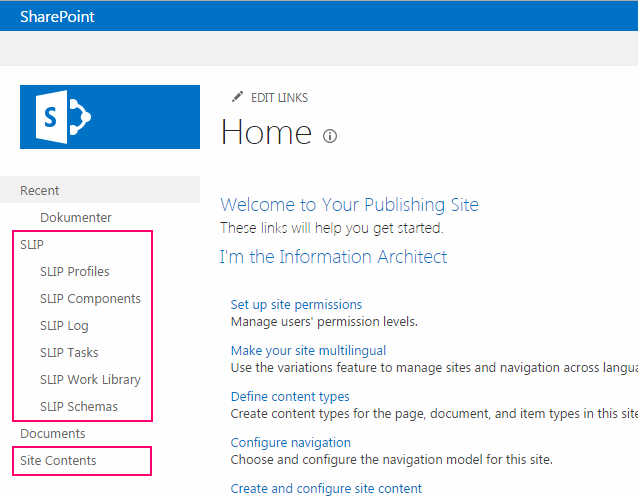
You will find links for the SLIP related list in the left-hand navigation or via the Site Contents link.
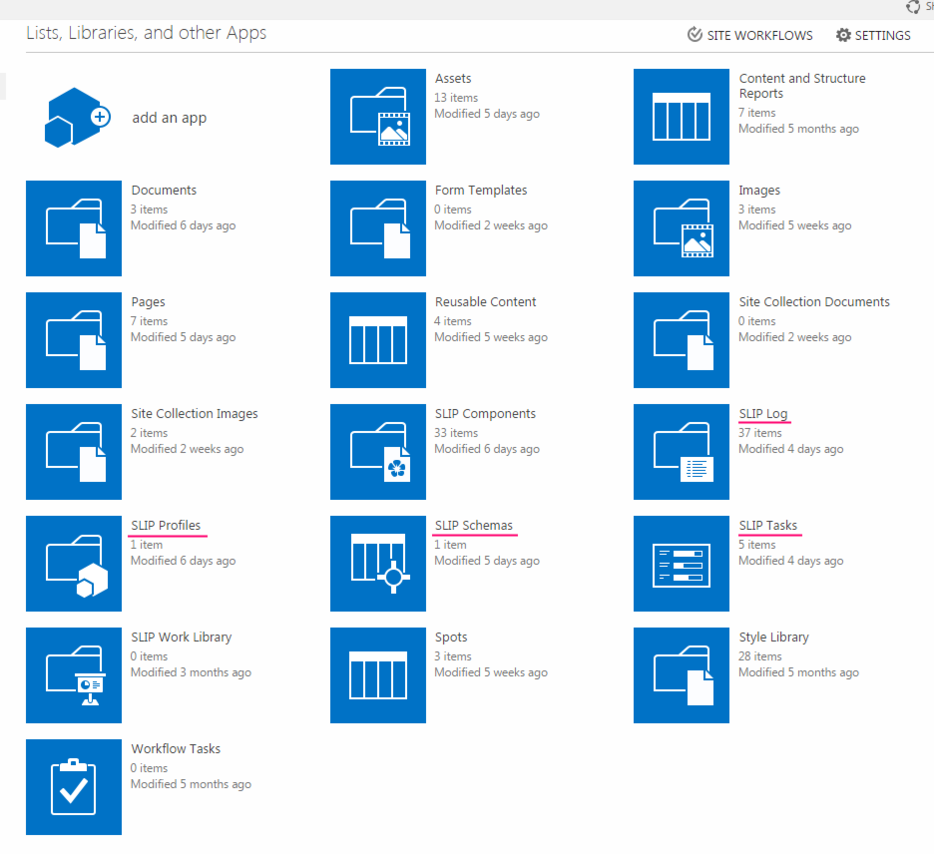
Site Contents gives an overview of all the lists and libraries in a site.
Further, the SLIP related lists always have static URLs relative to the site in which they live:
List | Relative URL |
Tasks | /SlipTaskList |
Profiles | /Lists/SlipProfileList |
Schemas | /Lists/SlipSchemaList |
Log | /Lists/SlipLogList |
Components | /Lists/SlipComponentList |
The following sections describe important functions and configuration options that may be helpful when troubleshooting and performing other administrative tasks.
Export/import
 The profiles contain the recipe, if you will, of how the system should process each kind of task. Each profile may be associated with a schema that specifies how to populate metadata properties of published content. As such, these items wrap many details about how the system should operate.
In order to move this information from one environment to another easily or to facilitate backup/restore, the system offers import and export functions.
When you export a profile, the associated schema is automatically included in the export. When you import a profile, you may choose whether to include the schema or just import the profile.
How to export profiles with schemas
Step | Action | |
1 | Open the SLIP Profiles list in a browser. | 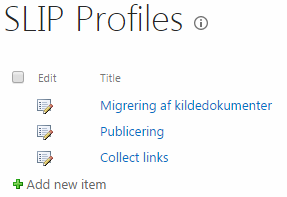
|
2 | Optionally pick one or more profiles by ticking the relevant check boxes. If you do not tick any boxes, the system will export all available profiles. | 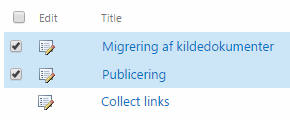
|
3 | In the ribbon, click the ITEMS tab. | 
|
4 | In the Manage group, click Export Profiles to File. | 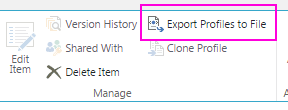
|
5 | You will receive a save prompt for an XML file that describes all the selected profiles. If you have selected a single profile, the suggested file name will reflect the title of the profile. | 
|
How to import profiles
Step | Action | |
1 | Open the SLIP Profiles list in a browser. | 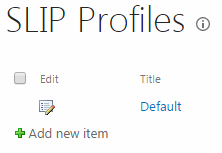
|
2 | In the ribbon, click the ITEMS tab. | 
|
3 | In the New group, click Import from File. | 
|
4 | Pick an existing profile archive file. Decide whether to include associated schemas in the import and whether to overwrite any existing profiles with the same title as those being imported. In most cases, it is fine to leave the default ticks. Finally click OK. | 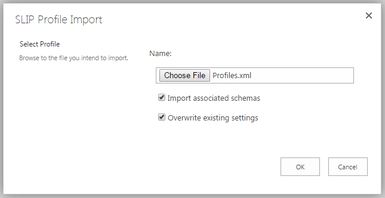
|
5 | Now the imported profiles are available in the SLIP Profiles list. | 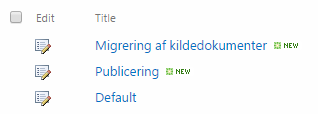
|
Depending on the values of the specific settings of the imported profiles and schemas, you may need to adjust properties like absolute URLs to match the environment where you did the import.
 Activation and Frequency
SharePoint powers the SLIP engine by a timer job. Each timer job instance services one web application. The root URL of a site identifies a web application. Given the site URL http://intranet.acme.com/sliptd/, the web application level would be http://intranet.acme.com/.
You can provision or remove the timer job for a web application via the feature SLIP Transaction Manager in the Central Administration interface.
How to provision the SLIP Transaction Manager timer job
Step | Action | |
1 | Open the Central Administration web interface. | 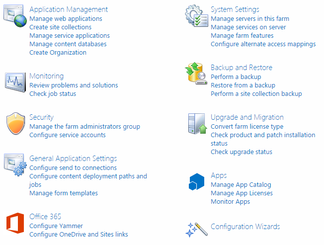
|
2 | Click Manage web applications. | 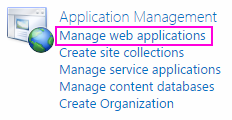
|
3 | Select the appropriate web application. | 
|
4 | In the ribbon, in the Manage group, click Manage Features. | 
|
5 | Locate the SLIP Transaction Manager feature and click Activate. Then click OK. | 
|
How to remove the SLIP Transaction Manager timer job
Step | Action | |
1 | Open the Central Administration web interface. | 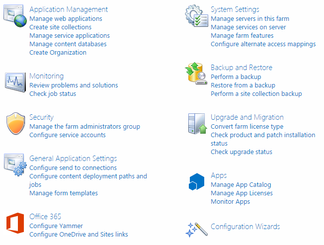
|
2 | Click Manage web applications. | 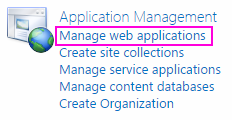
|
3 | Select the appropriate web application. | 
|
4 | In the ribbon, in the Manage group, click Manage Features. | 
|
5 | Locate the SLIP Transaction Manager feature and click Deactivate. | 
|
6 | Confirm deactivation by clicking Deactivate this feature. | 
|
This is one way to control task processing.
It is also possible to simply enable or disable the timer job. You can do this via Central Administration or you can do it within the SharePoint 2013 Management Shell.
How to disable a SLIP Transaction Manager timer job
Step | Action |
1 | Open SharePoint 2013 Management Shell. |
2 | Enter Get-SPTimerJob –Identity "SLIP Transaction Manager" | Disable-SPTimerJob |
How to enable a SLIP Transaction Manager timer job
Step | Action |
1 | Open SharePoint 2013 Management Shell. |
2 | Enter Get-SPTimerJob –Identity "SLIP Transaction Manager" | Disable-SPTimerJob |
By default, the schedule for the timer job is “every 10 seconds”. You can adjust this with the Management Shell also.
How to review the schedule for a SLIP Transaction Manager timer job
Step | Action |
1 | Open SharePoint 2013 Management Shell. |
2 | Enter Get-SPTimerJob –Identity "SLIP Transaction Manager" | select Schedule |
How to set a different schedule for a SLIP Transaction Manager timer job
Step | Action |
1 | Open SharePoint 2013 Management Shell. |
2 | Enter Get-SPTimerJob –Identity "SLIP Transaction Manager" | Set-SPTimerJob –Schedule "every 2 minutes" |
Please review the Schedule option under the Parameters section in the Set-SPTimerJob documentation, for more details.
You cannot set the original schedule of “every 10 seconds” with Management Shell because by default SharePoint only allows schedule frequency units of minutes or bigger. You can only restore the 10-second schedule by re-provisioning the SLIP Transaction Manager.
The SLIP Transaction Manager monitors all the sites that are part of a web application by default. When there are many sites, this becomes somewhat wasteful and therefore the system provides a function to control exactly which sites it visits in each scheduled cycle.
How to pick sites for SLIP Transaction Manager visits
Step | Action | |
1 | Open the Central Administration web interface. | 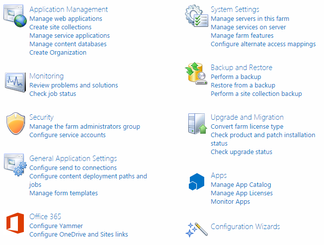
|
2 | Click Manage web applications. | 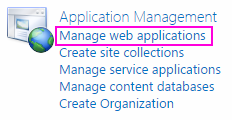
|
3 | Select the appropriate web application. | 
|
4 | In the ribbon, in the Manage group, click SLIP Tuning. | 
|
5 | You may choose to enter the URL of each site manually or you may simply use link Automatically populate to make a list of all sites with the SLIP engine enabled. Finally, click OK. | 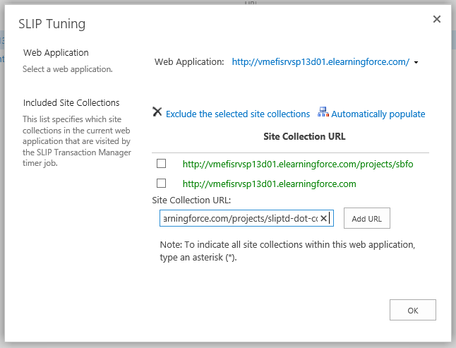
|
You can also use this interface to enable or disable the SLIP Transaction Manager for an individual site by removing the site URL from the list.
There is also an option to enable or disable the SLIP Transaction Manager within each individual site with SLIP.
How to enable or disable SLIP task processing within a site with SLIP
Step | Action | |
1 | Open the web site with SLIP. | 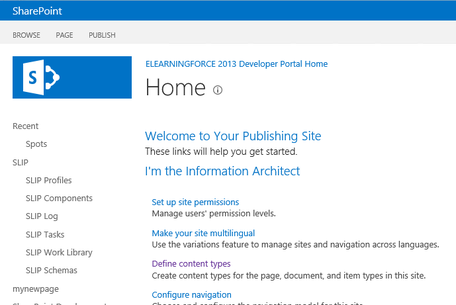
|
2 | Click the Settings gear icon, then Settings. | 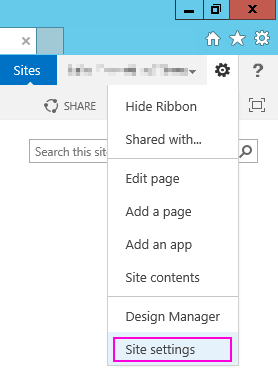
|
3 | Select the appropriate web application. | 
|
4 | In the ribbon, in the Manage group, click SLIP Tuning. | 
|
5 | Under Site Collection Administration, click SLIP task processing settings. | 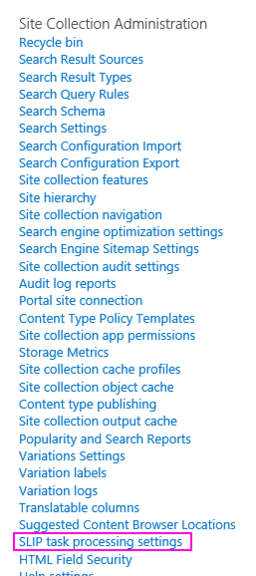
|
6 | In the Task Processing Settings page, you can set or remove the tick mark to enable or disable task processing for the Task List at this site. When done, click OK. | 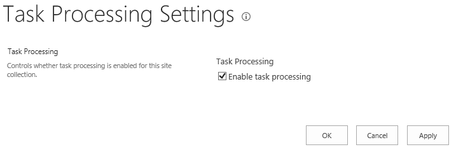
|
Clean Up
 When the system has been running for a while, it is natural that the SLIP Task List and the SLIP Log should contain quite a bit of data. Depending on the circumstances, you have the option to clean out some of this data.
The SLIP Log has a cap such that it will never contain more than 1000 entries. When the system writes new information to the log and exceeds 1000 items, it purges the oldest entries.
The situation for the SLIP Task List is different in that you must enable clean up explicitly. You do this by enabling the SLIP Clean Up Agent at the web application level.
How to enable the SLIP Clean Up Agent
Step | Action | |
1 | Open the Central Administration web interface. | 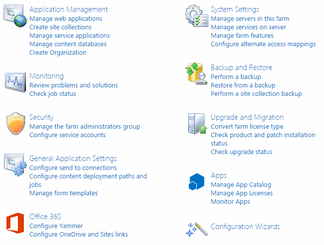
|
2 | Click Manage web applications. | 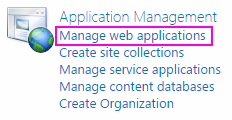
|
3 | Select the appropriate web application. | 
|
4 | In the ribbon, in the Manage group, click Manage Features. | 
|
5 | Locate the SLIP Clean Up Agent feature and click Activate. Then click OK. | 
|
When working with a system that continuously publishes information from one place to another, each document is likely to generate several tasks, one for each version. At the same time, as a systems manager, you may not require all the historic versions to be available indefinitely with the storage requirements and performance impact this entails. Conversely, when performing a migration or batch operation that runs within a limited period with many tasks going through the system, you may require that all tasks related are available even after completion. To accommodate this, the SLIP Clean Up Agent offers a few options that grant you flexible control over the automatic cleanup process. The agent runs once every hour in a timer job.
How to configure the SLIP Clean Up Agent
Step | Action | |
1 | Open the Central Administration web interface. | 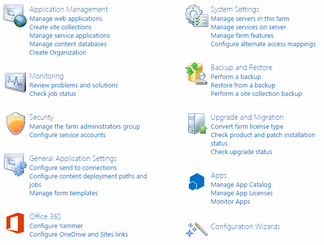
|
2 | Click Manage web applications. | 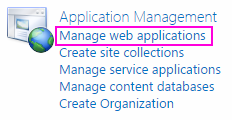
|
3 | Select the appropriate web application. | 
|
4 | In the ribbon, in the Manage group, click SLIP Clean Up Agent. | 
|
5 | Configure the scope setting to keep all tasks if you do not want any clean up. Choose to keep tasks with latest source version, to clean out tasks that do not represent the most recent version of a document. To conserve resources and gain simplicity, you may also choose to remove all tasks given that they exceed the age threshold described below. | 
|
6 | When the cleanup agent removes the tasks, it can delete them permanently or just move them to the recycle bin where that enter the normal recycle bin life cycle. Choose the option that you prefer. | 
|
7 | Regardless of the state of a task, whether it is the most recent version or not, you will probably want it to stay in the task list for a short while before removing it. Use the Age threshold setting to control the delay period before the cleanup agent considers a task for removal. | 
|
Error Handling

To ensure as much uptime as possible, you should establish monitoring on the SLIP process. One way to do this is with SharePoint list alerts. It would work to set up alerts either on the Task List or on the Log List, but to get immediate error details, that may indicate a condition that does not need any action, an alert on the Log List works best. You do not want alerts for everything that happens, only when something needs your attention. Therefore, we need to create a view for error log entries first.
Monitoring
How to establish an Errors view for the Log List
Step | Action | |
1 | Open the SLIP Log List in a browser. | 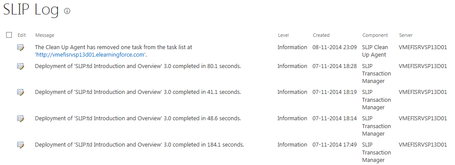
|
2 | Click the LIST tab in the ribbon. | 
|
3 | Click Create View in the Manage Views group. | 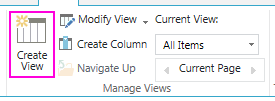
|
4 | Under Start from existing view, click the All Items link. | 
|
5 | Name the view Errors or similar. | 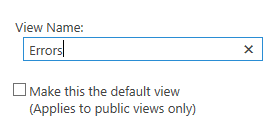
|
6 | Scroll down to the Filter section and input the condition that Level equals Error. Then click OK. | 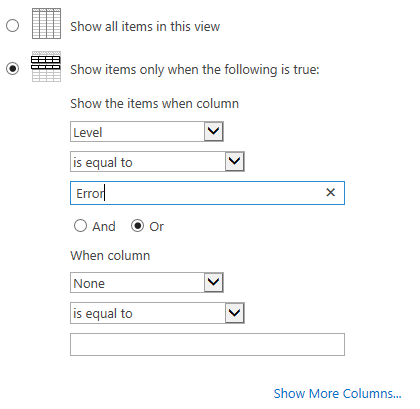
|
7 | You now see the Errors view. | 
|
The next step is to bind an alert to this view.
How to bind an alert to the log list
Step | Action | |
1 | Open the SLIP Log List in a browser. | 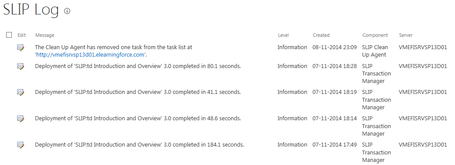
|
2 | Click the LIST tab in the ribbon. | 
|
3 | In the ribbon in the Share & Track group, click Alert Me and then Set alert on this list. | 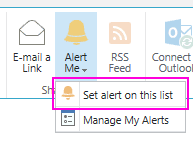
|
4 | Specify who should receive the alert. | 
|
5 | Filter the alerts to send notifications for the Errors view only. | 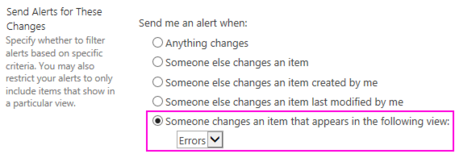
|
6 | Optionally adjust when to send alerts. Then click OK. | |
Troubleshooting
If you have set up an alert to receive notification when an error occurs, your starting point will be the log message. To identify the related task, make a note of the title and id of the task.

Then, you may locate the task in the SLIP Task List to aid in the investigation.
In most cases, it works well to read the error message very carefully. The underlying system will be the source of most errors and it is therefore possible to find solutions by searching the Internet using part of the error message.
What follows are a few examples of error messages and possible explanations for their reason.
Message | Possible cause | Solution |
One task has been checked out for more than 5 minutes and has not been updated in that time. The task has been marked failed and has been checked in. | The system began processing a task, but was interrupted or crashed very early in the process. | Requeue the task in question. |
Could not load file or assembly 'Binary Toolkit, Version=1.0.0.0, Culture=neutral, PublicKeyToken=8f5505a445cce3ae' or one of its dependencies. The system cannot find the file specified. | During the latest solution installation or update, some circumstance prevented the process from completing properly. One or more essential assemblies are missing from the global assembly cache. | Retry the installation. If the problem persists, request a newly repackaged solution. |
System.MissingMethodException: Method '… ' not found. | You have updated one package of the system, but there is a hard dependency on another part, that is not fulfilled. | Request updated packages for the core solutions. |
Microsoft.SharePoint.SPFileCheckOutException: The file "…" is checked out for editing by SHAREPOINT\system. | A former deployment has failed midway and left a file checked out or an event receiver crosses paths with the deployment process. | Manually undo the check out and requeue the task. |
Microsoft.SharePoint.SPFileCheckOutException: The file "…" is checked out for editing by domain\user. | The specified user has checked the deployment file out for editing. | Coordinate with the user to check the file in and requeue the task. |
Metadata mapping with target name '…' was not found. | The deployment depends on a metadata mapping that yields no value. | Check the mapping to identify the dependent properties and verify that they all contain values within their expected range. |
System.UriFormatException: Invalid URI: The hostname could not be parsed. | The Word document being converted contains a link with a malformed hostname. | You may urge the author to fix this manually or modify the profile to add the Office Open XML Document Repair action. |
Invalid text value. | One of the fields being populated according to the schema mappings receive an invalid value. This is usually because the text value exceeds the number of allowed characters in the field. | Inspect the source value and verify its contents. Modify the target field or change the input value. |
End of document.
Comments
Article is closed for comments.